Build and deploy a Statiq site to Github Pages in 5 min

A step by step walk through on how to create a Statiq site and deploy it to GitHub Pages.
Video walk through
Prerequisites
git (winget install Git.Git)
GitHub CLI (winget install GitHub.cli)
dotnet 6.0 (winget install Microsoft.DotNet.SDK.6)
You will need a GitHub Account.
Step by step
Login to gh
gh auth login
Follow the prompts.
Create the repo
gh repo create statiq-github-pages --public --gitignore VisualStudio
Enable GitHub pages
Open your newly created repo in the browser
gh repo view statiq-github-pages --webFrom the horizontal navigation bar select "Settings"

On the left choose
Pages
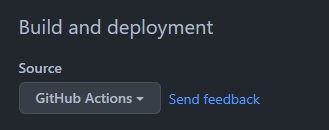
Select "GitHub Actions" as the "Build and deployment" "Source"
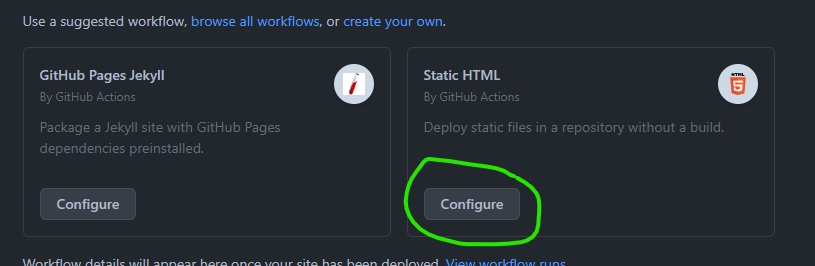
Select Configure next to "Static HTML" for the workflow.
Update the
pages.yamlas follows:# Simple workflow for deploying static content to GitHub Pages name: Deploy static content to Pages on: # Runs on pushes targeting the default branch push: branches: ["main"] # Allows you to run this workflow manually from the Actions tab workflow_dispatch: # Sets permissions of the GITHUB_TOKEN to allow deployment to GitHub Pages permissions: contents: read pages: write id-token: write # Allow one concurrent deployment concurrency: group: "pages" cancel-in-progress: true jobs: # Single deploy job since we're just deploying deploy: environment: name: github-pages url: ${{ steps.deployment.outputs.page_url }} runs-on: ubuntu-latest steps: - name: Checkout uses: actions/checkout@v3 - name: generate statiq site uses: actions/setup-dotnet@v1 with: dotnet-version: '6.0.401' - run: dotnet run --project ./MyGenerator/MyGenerator.csproj - name: Setup Pages uses: actions/configure-pages@v2 - name: Upload artifact uses: actions/upload-pages-artifact@v1 with: # Upload entire repository path: './MyGenerator/output' - name: Deploy to GitHub Pages id: deployment uses: actions/deploy-pages@v1Select
Start commitnear the top right
Then choose
Commit new file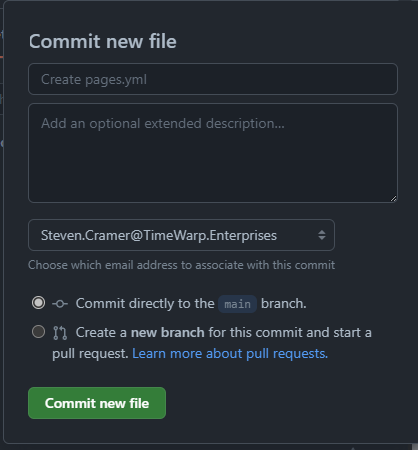
GitHub Pages is now enabled and will automatically update as commits are merged into the master/main branch.
Return to the console for next steps
Clone the git repo
gh repo clone statiq-github-pages
cd .\statiq-github-pages\
Write the dotnet project
create new console app
dotnet new console -n MyGenerator
cd .\MyGenerator\
Add the Statiq.Docs Nuget package
dotnet add package Statiq.Docs --version 1.0.0-beta.5Edit Program.cs to contain the following:
await Bootstrapper
  .Factory
  .CreateDocs(args)
  .RunAsync();
Create
inputfoldermkdir inputCreate
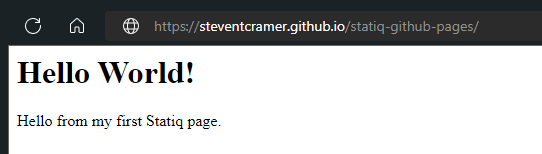
index.mdin theinputfolder asTitle: My First Statiq page --- # Hello World! Hello from my first Statiq page.add, commit and push
git add --all
git commit -m "My Statiq Github pages site"
git push
Enjoy
Browse to the published site.
https://YOURPROFILE.github.io/statiq-github-pages/
References
Dream Studio AI was used to generate the cover image.